The Dorsal Blocking Orthosis for Flexor Tendon Rehabilitation
7 therapeutic protocols following flexor tendon repair
Rehabilitation protocols for post-operative flexor tendon repair continue to advance! As surgical techniques improve with better visualization instruments and advanced suturing techniques, new approaches to post-operative rehabilitation are emerging.
Even so, one constant in all rehabilitation protocols has remained the Dorsal Blocking Orthosis. A versatile splint that limits the amount of active and passive finger extension to prevent possible tendon rupture. Among the various regimens, though, the exact wrist and finger joint placement may differ.
Overview
In this article, we’ll review some of the basic therapeutic protocols for flexor tendon repair, including new advances. We’ve also added material recommendations and our top splinting tips for the dorsal blocking orthosis.
Therapeutic protocols following flexor tendon repair
Each protocol requires specific wrist and finger positioning in the dorsal blocking orthosis. We’ve listed all details in the following overview:
Complete Immobilization
A basic regimen of complete immobilization following surgical flexor tendon repair may be suitable for children that are unable to follow directions, elderly patients with cognitive deficits, and patients deemed to be non-compliant with exercises.
Orthosis: either a long arm or short arm orthosis with no passive or active motion exercises initiated for 3 weeks.
At 3 weeks post-surgery, the wrist position could be changed to neutral.
Exercises: Check with your referring physician for complete directions on when to start an exercise regimen. Exercises must proceed with caution as immobilized tendons are generally weaker due to the lack of stress applied as they heal.
Kleinert Protocol
The Kleinert protocol was established to incorporate a dynamic pull on the involved finger(s). Accordingly, this would avoid tension on the sutured tendon.
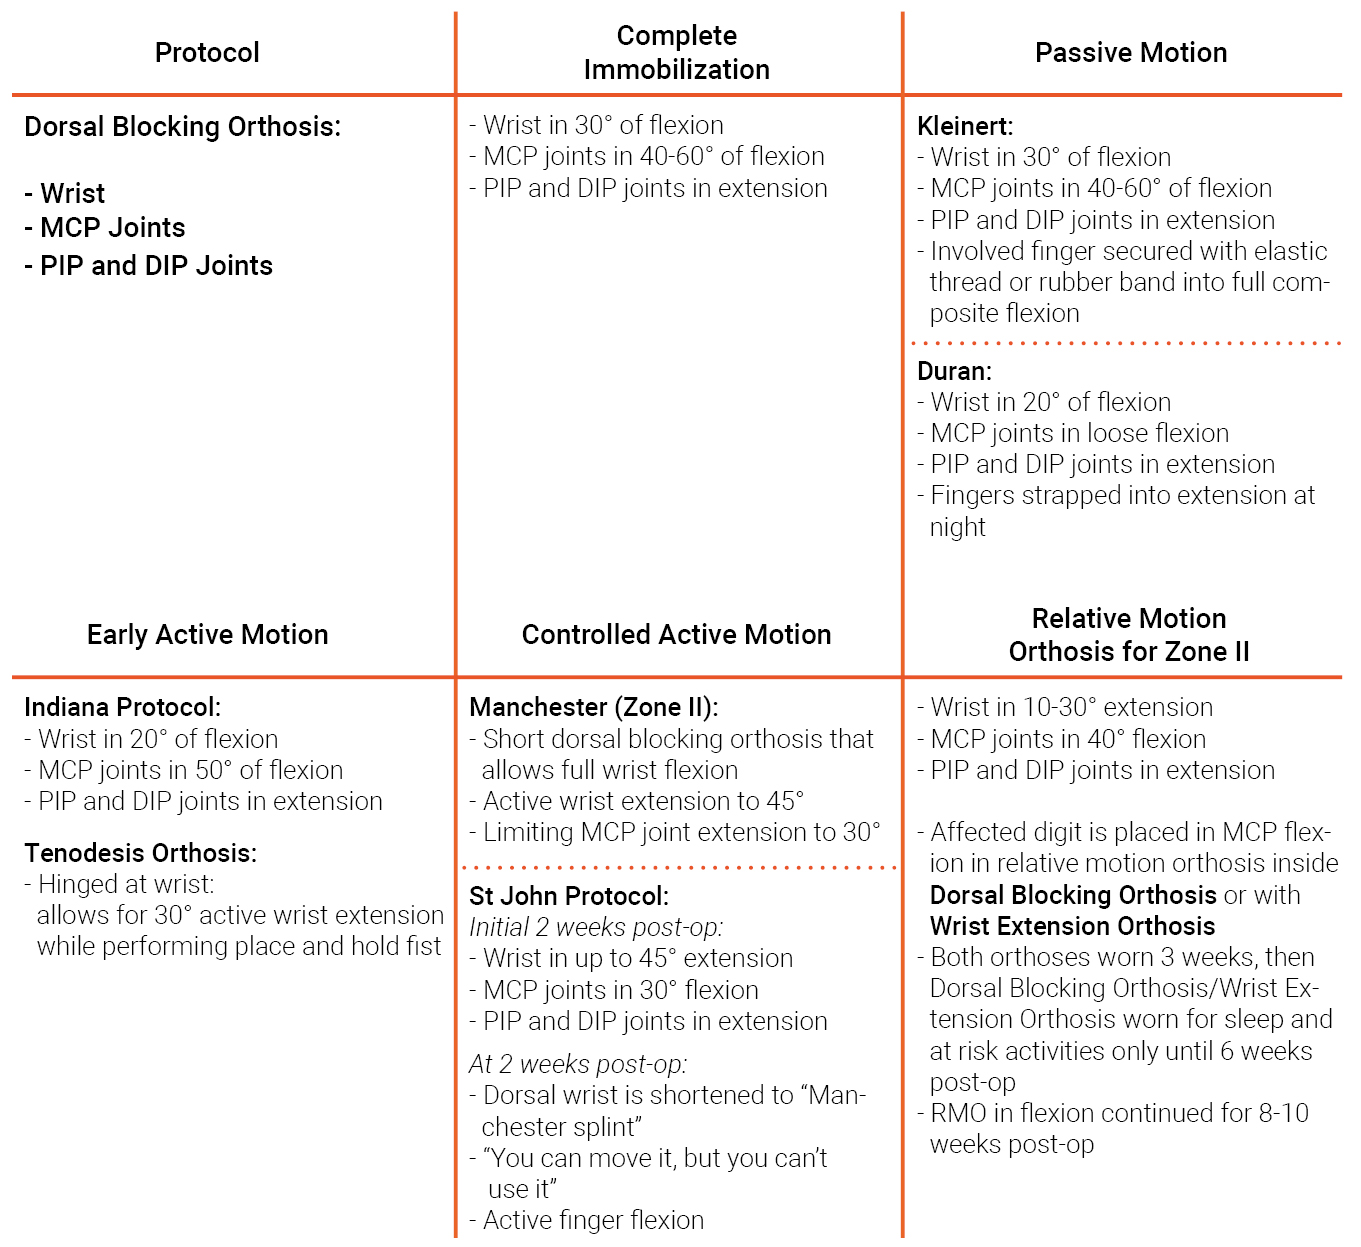
Orthosis: The involved wrist and fingers are placed in a dorsal blocking orthosis. An elastic thread or a rubber band is typically attached to the involved finger via a suture through the nail, via a hook glued to the nail, or using an elastic thread attached to a finger cap. This rubber band pulls the involved finger(s) into complete PIP and DIP flexion and attaches to the volar forearm or a volar placed strap. A pulley or bar, placed on a palmar component, ensures both full DIP and PIP flexion.
Exercises: Active extension within the limits of the dorsal blocking splint with 50 repetitions each hour. In addition: passive flexion to the PIP & DIP joints, followed by composite passive flexion to each digit (5 repetitions per hour).
Complications from this protocol, primarily PIP flexion contractures due to holding the injured finger in flexion all the time, contributed to the creation of another passive motion protocol called the Modified Duran Protocol.
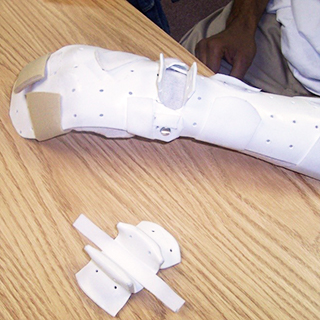
Flexor tendon Kleinert orthosis
Modified Duran Protocol
The original Duran orthosis stopped at the PIP joints in order to visualize full PIP extension during the exercises and included rubber band traction, which was eliminated in the modified Duran orthosis.
Orthosis: The modified version incorporated the full length of the fingers in the orthosis and also added strapping of the fingers in full extension overnight. In consequence, this reduced the problems with PIP joint contractures.
Exercises: In general, patients are instructed to perform passive flexion and active extension exercises to each individual finger joint and to the entire finger on an hourly basis.
Indiana Protocol
The Indiana Protocol is classified as an Early Active Mobilization protocol. It is generally a great option for clients who demonstrate minimal edema and minimal complications. It relies on a strong surgical repair of 4 strands across the tendon plus an epitendinous suture.
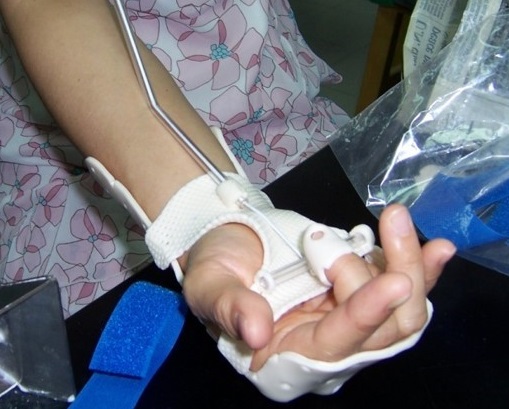
Orthosis: Every hour, patients switch from a dorsal blocking orthosis to a hinged Tenodesis orthosis which allows limited active wrist extension. The orthosis soon evolved into one orthosis with a hinge and an additional insert that could prevent movement.
Exercises: The patient places their fingers in full passive flexion. They hold this position (Place and Hold) while actively extending the wrist.
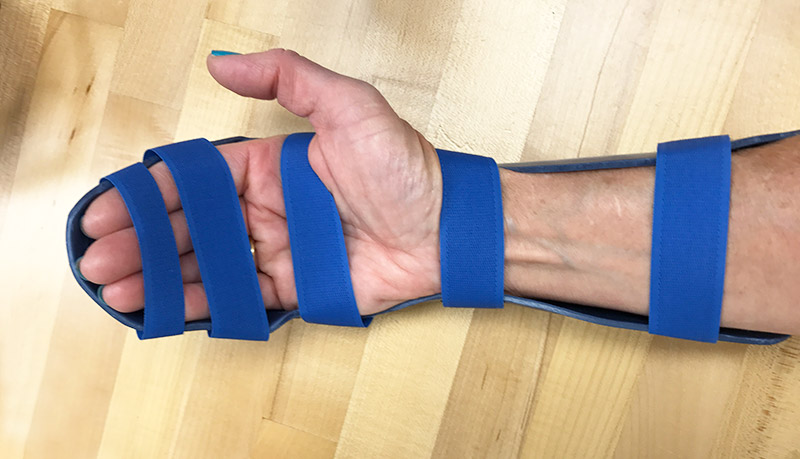
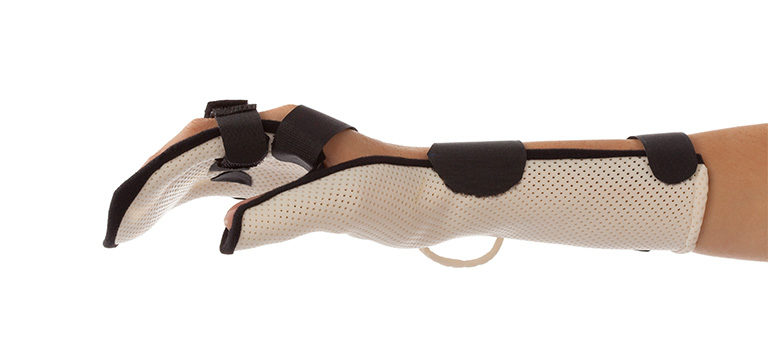
Regular dorsal blocking orthosis
Tenodesis Orthosis with insert to prevent motion
Manchester Protocol
The Manchester Protocol is appropriate for patients following surgical repair of flexor tendon lacerations in Zone 2, treated with a 4 strand surgical repair.
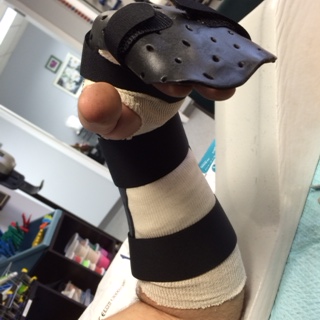
Orthosis: a short dorsal-based orthosis that allows maximal wrist flexion and up to 45 degrees of wrist extension with a block to MP joint extension at 30 degrees.
Exercises: Patients perform active finger flexion with the wrist extended, as well as active finger extension with the wrist flexed. The use of volar thermoplastic finger extension orthoses at night prevents flexion contractures.
A recent study compared patients treated with this short orthosis protocol to patients treated with the traditional forearm based orthosis. The researchers found that the short orthosis favored an improved PIP flexion arc early on, with a greater gain in DIP flexion at the final comparison.
Manchester Orthosis
St. John Protocol
The St. John Protocol is implemented following a wide-awake surgical repair of the lacerated tendon. This surgical technique allows the surgeon to address gapping of the tendon during active movement. Additionally, the surgeon can make sure that there is sufficient gliding of the repaired tendon underneath the finger pulleys while the wound remains open. Find out more about this protocol here.
Orthosis: a dorsal blocking orthosis following wound closure. The patient can only initiate active motion after 3-5 days.
Exercises: Exercises commence with passive range of motion to warm up the finger joints, followed by gentle active flexion into ½ of a full fist and active extension in the orthosis.
A relative motion orthosis might be added to the program to address PIP joint contractures at 6 weeks post-surgery.
New evidence gained from the wide-awake surgical procedure indicates that “place and hold” exercises cause a “buckle and jerk” motion, placing stress on the repaired tendon. Active motion into ½ of a full fist, on the other hand, allows gentle gliding of the tendon without added stress.
Relative Motion Orthosis for Zone II Repairs
A new retrospective study looked at patients following surgical repair of flexor tendons in Zone II. These patients were treated with a relative motion flexion orthosis in combination with either a dorsal blocking orthosis or wrist orthosis.
Orthosis: the patients wore both orthoses full-time for the initial 3 weeks following surgery.
Exercises: passive PIP and DIP joint flexion, passive IP joint extension to neutral with the MCP joint flexed, and active finger motion in the relative motion orthosis. Light use of the hand was allowed.
At 3 weeks, the patients continued with only the relative motion orthosis during the day. They included the larger orthosis at night and during activities of risk until 6 weeks post-op. After this period, the patients wore the relative motion orthosis by itself for an additional 2-4 weeks. The patients in this small study did well with no ruptures and no complications.
Disclaimer: It is important to discuss each individual patient with the referring surgeon to determine which rehabilitation protocol to follow. Use these protocol descriptions as guidelines that can be modified based on a patient’s exact requirements and needs.
Choosing the right materials
Dorsal blocking orthoses are placed over the dorsum of the forearm, wrist, and digits and therefore place stress over the ulnar head, the flexed MP joints, and the dorsal PIP and DIP joints. In general, a conforming material will drape and capture the shape of these bony landmarks and prevent stress and shearing forces.
You can use a heat gun to further bump out these spots on the orthosis. Another tip is to place a piece of Theraputty (or a small piece of non-stick thermoplastic) over the ulnar head and form the dorsal orthosis over this putty, creating a larger bumped out spot. You can remove the putty from the inside when the orthosis has hardened. Be sure to use a non-stick coated material, and rub a little lotion over the putty to prevent adherence.
Consider using a material with adequate memory, as the orthosis may require further modifications to alter the wrist position and to help reduce edema.
Suggested thermoplastic materials:
Multifit NS: Ideal for the fabrication of rigid and supportive orthoses. This material has the perfect balance between drape and resistance to stretch. It holds its shape perfectly against increased tone, and readily contours to the fingers, hands, and wrist using mild to moderate pressure.
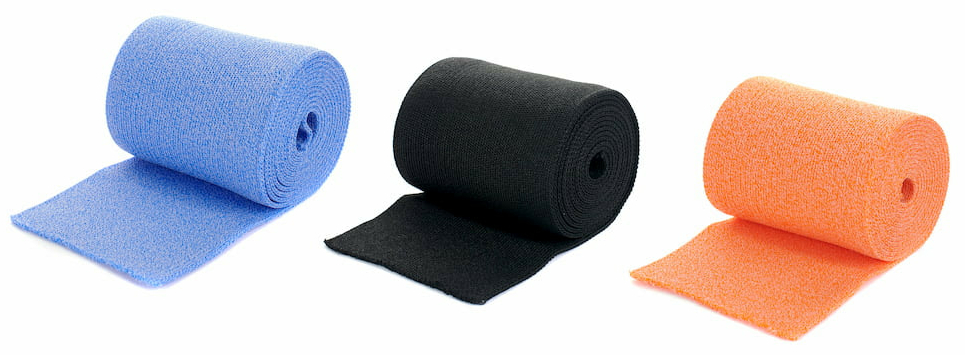
Orfilight, Orfilight Atomic Blue NS and Orfilight Black NS: extremely lightweight and highly conforming, which makes them perfect for the fabrication of these types of orthoses. Thanks to the stretch, these materials contour well to the anatomy and make the fabrication process considerably easier.
Note: These products come in three thicknesses and different perforation patterns.
Orthoses made from Orfilight products are comfortable and supportive without adding additional weight to the injured body part. Orfilight products feel light and foamy during the orthotic fabrication, but are strong and maintain the specific desired posture when hardened.
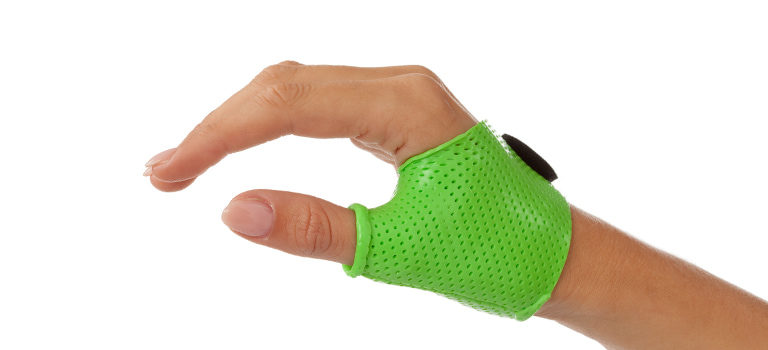
Orficast: ideal for the fabrication of the relative motion orthosis. This orthosis can be part of a newly described protocol for Zone II repairs as well as helpful at addressing PIP flexion contractures. For contracture management, position the MCP joint of the involved finger in flexion to elicit the transmission of force towards active PIP extension.
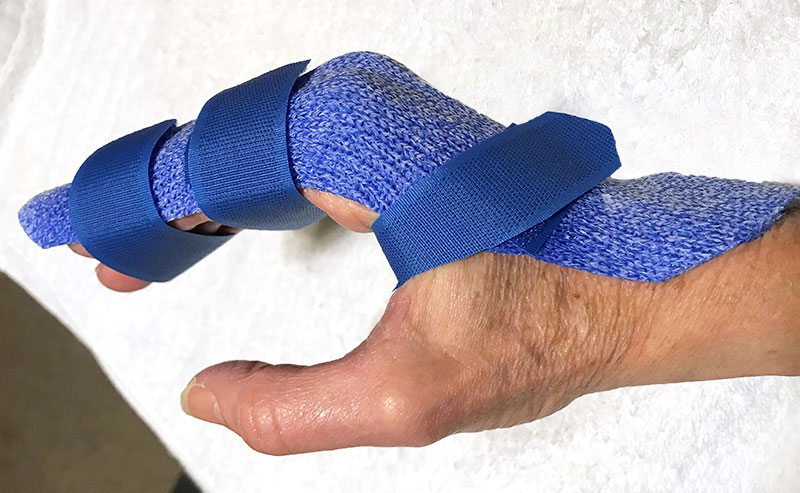
Orficast More 15 cm (6″): Try this material for the shorter dorsal blocking orthosis as described in the Manchester protocol. In general, Orficast More is highly conforming and lightweight, yet rigid enough to maintain the desired hand and wrist positions as outlined.
Orficast More 15 cm is a great option for the shorter dorsal blocking orthosis.
Tips for the fabrication of a dorsal blocking orthosis
Have the patient sit with both elbows on the table. Let him/her make a fist with the uninvolved hand and support the involved hand so that the wrist is in the desired position and the MP joints are supported in flexion, with the fingers in extension.
Use a rectangular piece of thermoplastic material wide enough to capture the widest part of the patient’s hand and forearm.
Stretch the material distally over the fingertips and pull proximally towards the elbow. In effect, the material will stretch and conform to the flexion of the MP joints and the wrist position.
Avoid excessive handling of the material as this will cause fingerprints and marks which can irritate the patient’s skin. Overall, you only need minimal handling to secure the position of the material around the wrist and forearm.
Watch this video for more tips on fabricating a dorsal blocking orthosis:
Henry, S. L., & Howell, J. W. (2020). Use of a relative motion flexion orthosis for postoperative management of zone I/II flexor digitorum profundus repair: A retrospective consecutive case series. Journal of Hand Therapy, 33(3), 296-304.
Higgins, A., & Lalonde, D. H. (2016). Flexor tendon repair postoperative rehabilitation: the Saint John protocol. Plastic and Reconstructive Surgery Global Open, 4(11).
Neiduski, R. L., & Powell, R. K. (2019). Flexor tendon rehabilitation in the 21st century: A systematic review. Journal of Hand Therapy, 32(2), 165-174.
Peck, F. H., Roe, A. E., Ng, C. Y., Duff, C., McGrouther, D. A., & Lees, V. C. (2014). The Manchester short splint: a change to splinting practice in the rehabilitation of zone II flexor tendon repairs. Hand Therapy, 19(2), 47-53.
Written by Debby Schwartz, OTD, OTR/L, CHT
Physical Rehabilitation Product and Educational Specialist at Orfit Industries America.
Debby is a certified hand therapist with over 36 years of clinical experience. She completed her Doctorate of Occupational Therapy at Rocky Mountain University of Health Professions in 2010. She has worked at Orfit Industries America as Product and Educational Specialist since 2007.
Debby is also an adjunct professor at the Occupational Therapy Department of Touro University, School of Health Sciences, and at the Occupational Therapy Department at Yeshiva University, Katz School of Science and Health in NYC. She has written many book chapters in the field of hand therapy and multiple articles for hand therapy journals, including the ASHT Times and the Journal of Hand Therapy. She has published a new textbook on orthotic fabrication together with Dr. Katherine Schofield, entitled “Orthotic Design and Fabrication for the Upper Extremity: A Practical Guide”.
If you’d like to receive the latest product updates and interesting Orfit news, subscribe to our newsletter:
We've selected some similar articles for you
10 Questions and Answers about Arthritis and Orthoses
The ins and outs of treating arthritis with an orthosis
Arthritis is a very common disorder that includes more than 100 different types of joint diseases and can affect people of all ages. In this article, we tell you about the basic ins and outs of arthritis, how it is diagnosed and how orthoses can help people who suffer from this common yet often misunderstood joint disease.
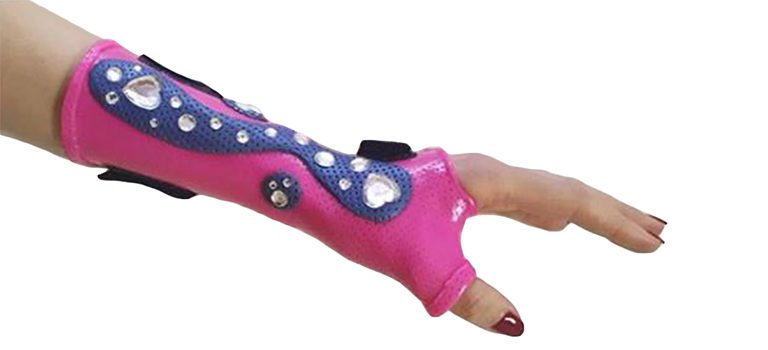
Create beautiful orthoses that put a smile on your patient's face
Once you have fabricated an orthosis for a patient, how are you going to ensure that they wear it as prescribed? It might be worth your time and effort to decorate the orthosis and/or personalize it so that the patient feels it is special and worthwhile to wear.