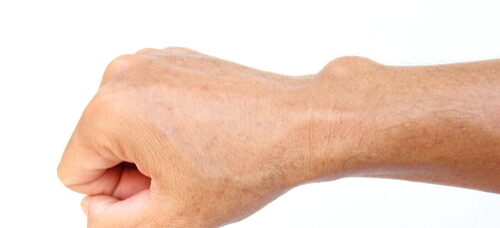
The resting hand orthosis, an orthosis that immobilizes the wrist, fingers, and thumb, is an important intervention for patients with many clinical conditions, including stroke, arthritis, burns, and others. It provides protection and a safe position for healing.
This orthosis is often one of the first orthoses taught to novice clinicians, yet despite its relatively simple design, it can be a challenging orthosis to fit and mold over an actual patient’s extremity. Special consideration and detail must be paid to the accurate molding of the thermoplastic material in the palm to preserve the arches of the hand and in the first web space to prevent contractures. The wrist should be positioned in extension to maintain the length of the extensor and flexor tendons. The thermoplastic material chosen for this orthosis must be rigid enough to support the patient’s limb, but easily molded to contour and drape to the exact anatomy.
In this blog, we break down some of our tips and tricks for accurate pattern making and molding of this important orthotic design.
Tips and Tricks for Pattern Making
Here are the main steps of pattern making:
- Place the patient’s forearm, wrist and hand palmar side down on a paper towel. If this is not possible with the affected hand, use the patient’s other hand or use your own hand and modify the pattern afterwards to fit the patient.
- Draw an outline of the forearm, wrist and hand, giving extra width to the forearm on both radial and ulnar sides. Draw a mitten shape around the fingers. You don’t need to include the thumb.
- Mark the following anatomical landmarks:
-
-
- 2/3 the length of the forearm
- The first webspace
- The webspace between the index and middle fingers
- The narrowest part of the wrist
- Remove the patient’s extremity from the paper towel and mark the thumb cut out as follows: draw a dotted line across the palm from the first web space. Draw a dotted line towards the forearm from the mark made between the fingers. Mark where these two lines meet.
- From this spot, draw the shape of the thumb cut out. The length goes as far as the narrowest part of the wrist. See Figure 1.
- Cut out the entire pattern and place it on the volar surface of the patient’s arm to check the fit.
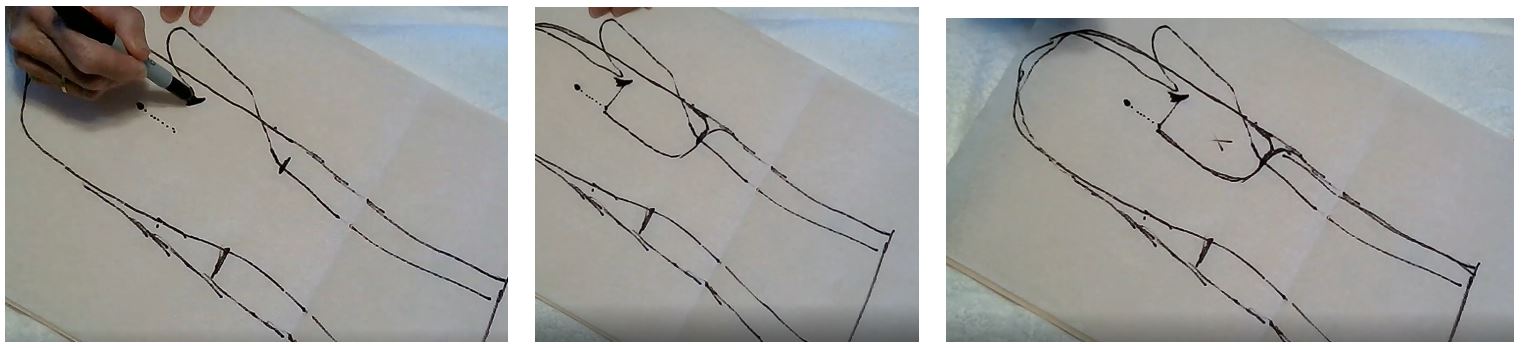
Figure 1
Recommended Materials
Orfit Multifit NS in 3.2mm1(/8”) is an excellent low temperature thermoplastic material that allows for accurate molding and contour while providing significant strength and rigidity to the finished orthosis. Multifit NS is available in Pearl White and in Black, with perforations and without.
Other materials that will also work well for this orthotic design include Orfit Eco and Orfit Eco Black NS and our elastic based materials: Orfit Classic, Aquafit NS (Orfit Natural NS) and Orfit NS. These elastic based products have full memory in case the orthosis positioning and shape need to be remolded over time.
Checklist to ensure proper positioning and support of your patient’s extremity
There are many sources in the current evidence to support use of the resting hand orthosis for a variety of clinical conditions. One article in particular highlights a fabrication checklist of important details for orthoses for patients with burns. I revised the checklist slightly for the functional resting position and share this as a guideline to ensure proper positioning and support of your patient’s extremity.
|
|
Positioning |
Remarks
|
|
Forearm
|
2/3rd the length of the forearm and ½ the circumference of the forearm |
Does not interfere with elbow flexion
|
|
Wrist
|
20-30 degrees of extension |
Does not impinge on the ulnar head during forearm rotation
|
|
Metacarpal phalangeal (MCP) joints
|
45-60 degrees of flexion |
Palmar arch is supported
|
|
Proximal interphalangeal (PIP) joints
|
Slight flexion
|
|
|
Distal interphalangeal (DIP) joints
|
Slight flexion
|
|
|
Thumb
|
Wide palmar abduction Slight flexion at MCP and interphalangeal joints |
Thumb placed volar to index finger
|
Final tips for finishing your orthosis
👍🏻 the strap width matches the relevant body part
👍🏻 the loop strapping completely covers the adhesive backed hook on the orthosis
👍🏻 edges are smooth and corners are round
👍🏻 markings are not visible on the orthosis
📽 Watch the instructional video to follow A-Z fabrications steps 📽
References:
Jacobs MA, Austin NM. (editors) Orthotic Intervention for the Hand and Upper Extremity: Splinting Principles and Process. 3rd Edition. Wolters Kluwer. Philadelphia. 2020:2-24.
Schofield K, Schwartz DA. Orthotic Design and Fabrication for the Upper Extremity: A Practical Guide. SLACK, Inc. Thoroughfare, NJ. 2019.
Warthman, R., Martinez, A., Murray, D., Richey, K., & Foster, K. N. (2022). 784 A Burn Resting Hand Orthosis Fit Checklist. Journal of Burn Care & Research: Official Publication of the American Burn Association, 43(Suppl 1), S198.


Written by Debby Schwartz, OTD, OTR/L, CHT
Physical Rehabilitation Product and Educational Specialist at Orfit Industries America.
Debby is a certified hand therapist with over 36 years of clinical experience. She completed her Doctorate of Occupational Therapy at Rocky Mountain University of Health Professions in 2010. She has worked at Orfit Industries America as Product and Educational Specialist since 2007.
Debby is also an adjunct professor at the Occupational Therapy Department of Touro University, School of Health Sciences, and at the Occupational Therapy Department at Yeshiva University, Katz School of Science and Health in NYC. She has written many book chapters in the field of hand therapy and multiple articles for hand therapy journals, including the ASHT Times and the Journal of Hand Therapy. She has published a new textbook on orthotic fabrication together with Dr. Katherine Schofield, entitled “Orthotic Design and Fabrication for the Upper Extremity: A Practical Guide”.
Debby’s Google Scholar
If you’d like to receive the latest product updates and interesting Orfit news, subscribe to our newsletter: