personal fit
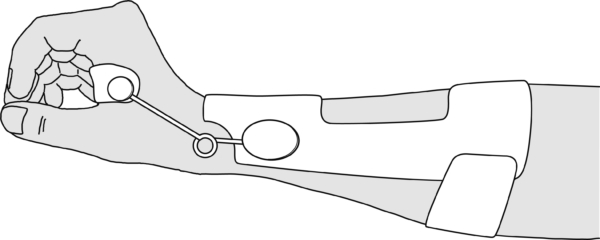
Functional wrist extension splint
Paralysis of the wrist extensors (radial nerve palsy).
Tip: this splint is available as a kit.

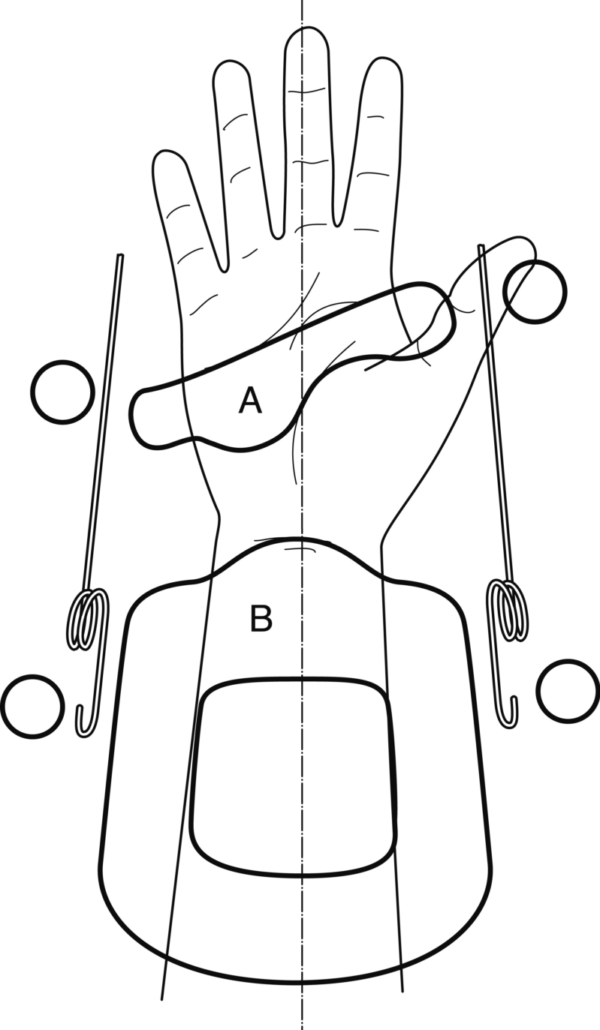
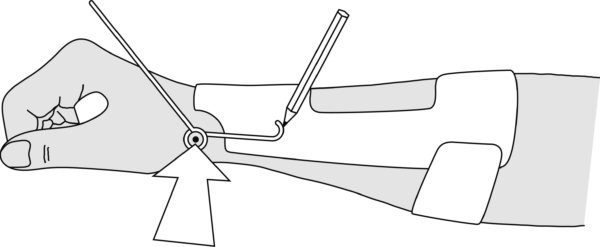
Mark the flexion-extension axis of the wrist.
Successively mould pattern A in the palm of the hand and pattern B on the forearm.
Position pattern B exactly as shown on the drawing and attach a broad Velcro band proximally on the forearm section.
Mark the place of the spring as it is aligned with the flexion-extension axis.
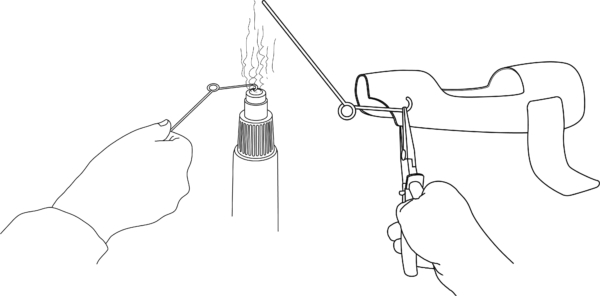
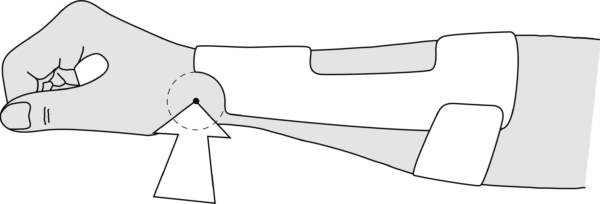
Remove the splint from the patient. Heat the curved end of the spring and melt into the splint material.
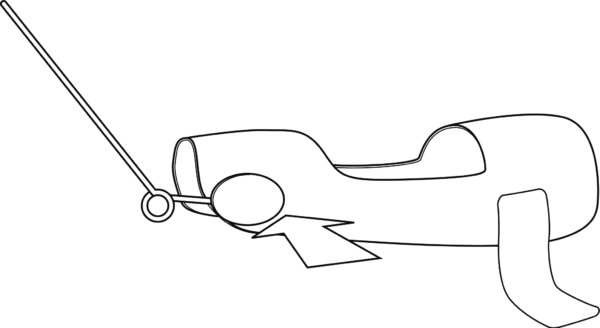
Secure the fixation with a thermoplastic coin dry heated and stuck over it. Fit the second spring in the same way, ensuring that both are perfectly aligned.
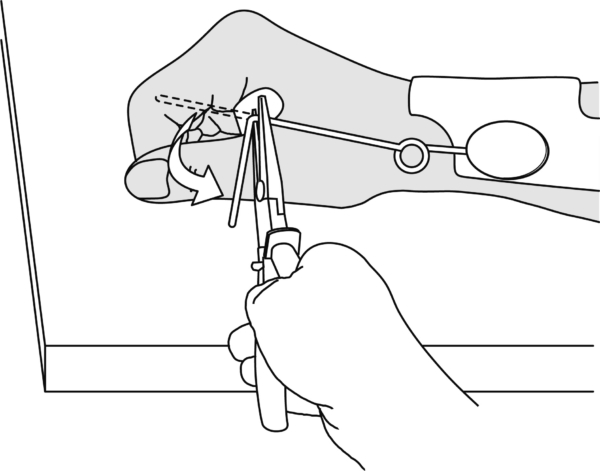
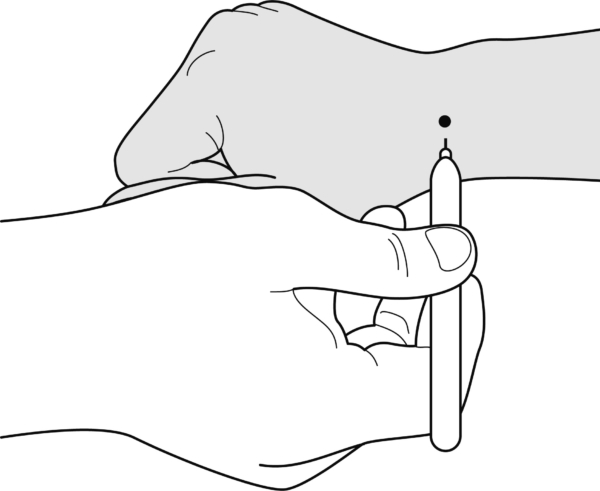
Place the splint back on the patient. The patient holds the volar piece of the splint in a fist whilst resting the hand on the table. Push the free arm of the spring downwards until parallel to the metacarpal. Measure the distance and bend the spring arm 90° downwards and further into a U-shape. Cut off the excess material. Mark the position of the U-shape on the side of the splint.
Remove the splint from the patient. Heat the U-shape and melt it into the plastic. Secure with a thermoplastic coin. Proceed in exactly the same way on the ulnar side.
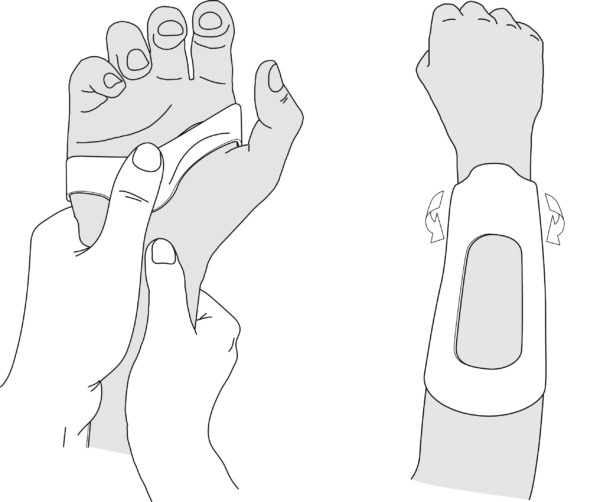
Finishing and fixation straps:
- Apply soft padding material at the level of the wrist.
- One strap already provided proximally.
- Optionally, a narrow strap crossing the wrist and one over the back of the hand for greater comfort.