The
personal fit
personal fit
Extensor tendon mobilization – zone 5 & 6
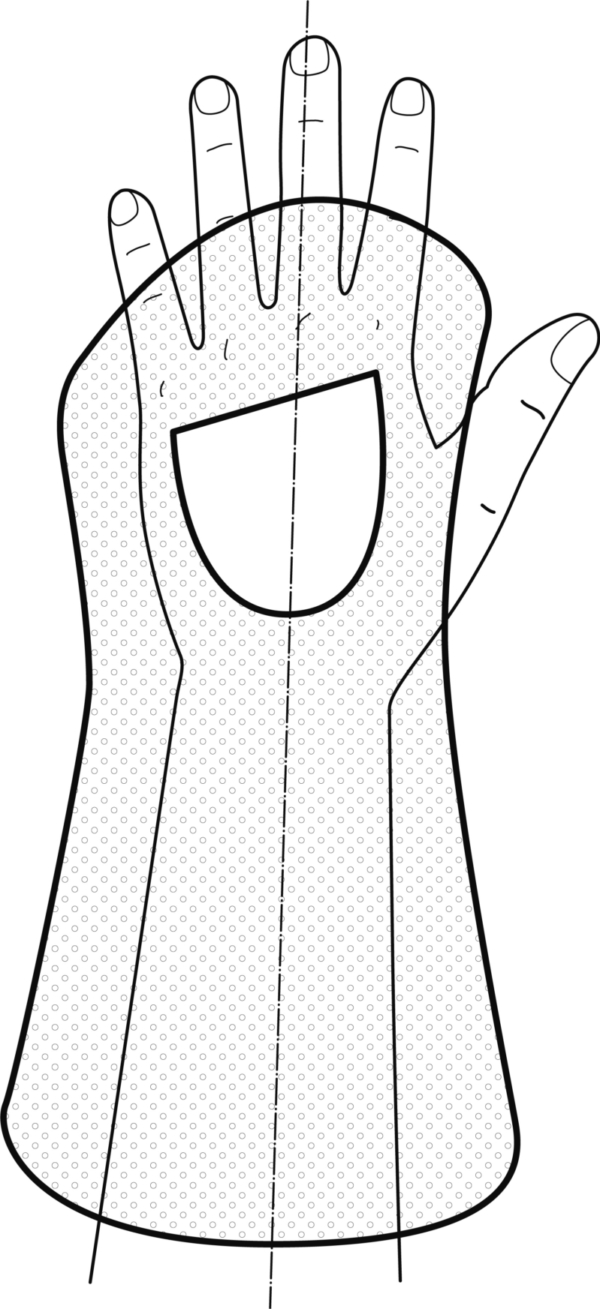
Objective
Early passive mobilization of the extensor tendons.
Indications
Post-surgical tendon suture.
Fabrication steps
Recommended products
Thicknesses mm (inches)
1,6 mm (1/16")
2,0 mm (1/12")
2,5 mm (3/32")
3,2 mm (1/8")
Perforations

Non Perforated

Mini Perforated

Maxi Perforated

Micro Perforated

Micro Plus Perforated
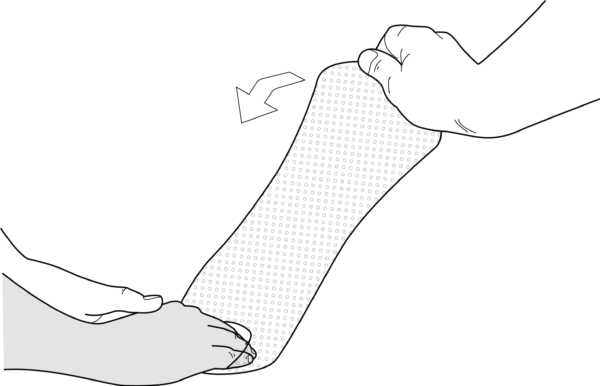
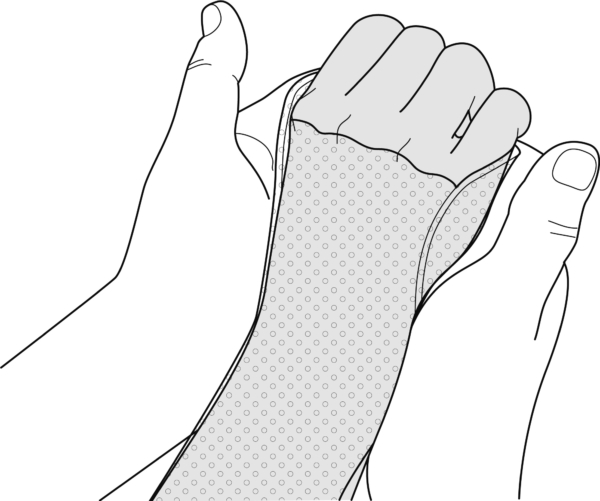
1.
Pull the patient’s hand through the slit of the splint to right over the MCP joints.
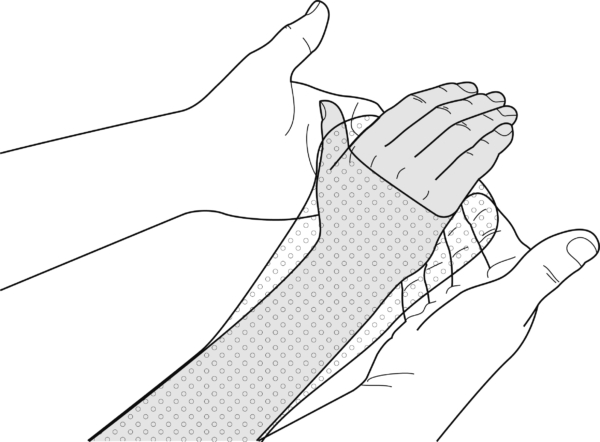
2.
Mould the palmar resting plate for the fingers.
3.
Fold the lateral wings upwards. Press so that they stick.
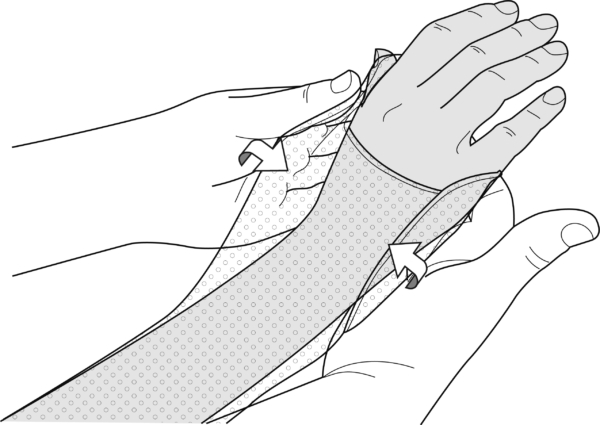
4.
Position the fingers (e.g. 30° flexion) and the wrist (e.g. 30° extension).
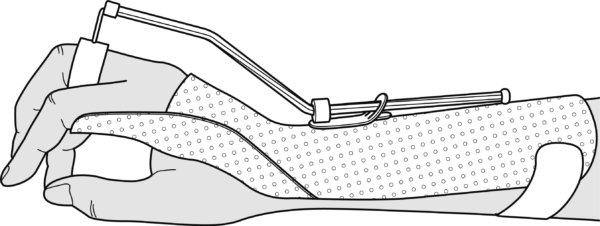
5.
Attach the necessary number of Orfitubes, and make the finger loops and elastics
as described in the introduction.
Finishing and fixation straps:
- Leave sufficient room between the back of the hand and the splint.
- Fit a broad fixation strap proximally under the forearm.