An injury to the extensor tendon in Zone 1, over the Distal Inter-Phalangeal (DIP) joint and/or middle phalanx, is termed a mallet finger. This injury occurs when there has been a disruption of the terminal slip extensor tendon, causing the finger to droop and the inability to actively extend the fingertip.
The mechanism of injury can be sudden forceful flexion of the extended fingertip or blunt trauma to the dorsum of the finger. The injury can even result in a variable-sized bone avulsion from the distal phalanx or fracture through an open epiphysis.
Treatment
The main goal of an orthosis for the mallet finger is to maintain the DIP finger joint in passive (or slight hyper) extension so that healing of the injured tissue takes place. The orthosis should allow functional flexion of the Proximal Inter-Phalangeal (PIP) joint. This orthotic intervention promotes tendon healing without the formation of adhesions, resulting in a strong tendon that is able to pull through its full excursion.
In practice, the patient should wear the mallet orthosis fulltime for a period of 6-8 weeks and may need to continue this with 4-6 weeks of night use as well. Active exercises for DIP flexion can be started after the 6-8 weeks immobilization period.
When discussing the wearing schedule with the patient, it is important to instruct the patient that the DIP joint must be maintained in extension at all times, even during wound care or daily hygiene.
Key Points
- The DIP joint should be held in maximum comfortable extension or in slight hyperextension (Exact position per MD orders)
- Over-extension of the DIP joint is to be avoided.
- The orthosis should allow near full PIP joint flexion.
- The orthosis must be worn full time for the 6-8 week period to allow for healing.
Orthotic Solutions
There are so many different designs for orthoses for the mallet finger! Anything is possible and any orthosis that maintains the DIP in extension is suitable.
Here are our favourite designs and materials for easy and quick fabrication:
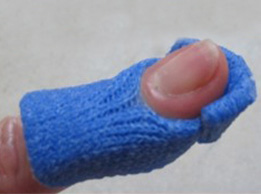
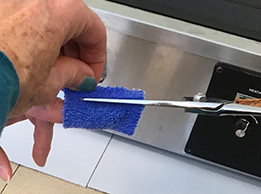
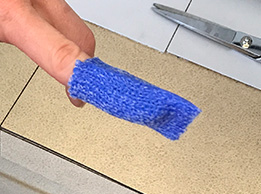
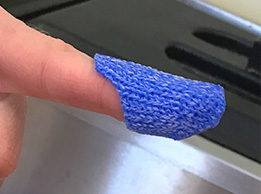
Fabricate a circumferential finger orthosis. Pinch around the middle and distal phalanges, leaving the PIP joint free. Make the seam dorsal and cut away the excess as you pull the seam upwards. Then make sure to position the DIP in the desired amount of extension.
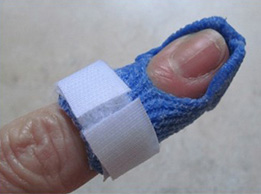
The stickiness of the material helps to create a thin and neat-looking dorsal and permanently bonded seam. The micro-perforation style provides proper ventilation. Trim away the volar portion under the middle phalanx and attach a strap or tape.
Option 1:
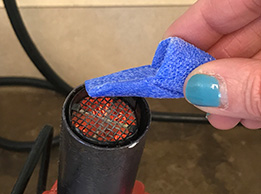
Using a 15 cm (6”) piece of Orficast 3 cm, activate the material and fold in half. Cut lengthwise in the middle, towards the folded edge, but leave about 2.5 cm (1”) intact. Place this uncut end over the middle phalanx.
Stretch the narrow strips around and under distal phalanx. Support distal phalanx in slight hyper-extension while pinching Orficast strips together. Trim corners and apply a strap over middle phalanx.
Option 2:
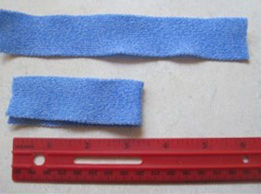
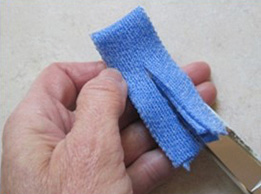
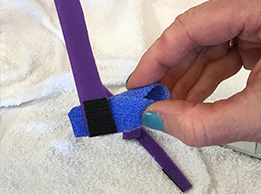
Using the narrow Orficast 3 cm (1”), cut a strip around 20 cm (8”) long. Activate and fold in half.
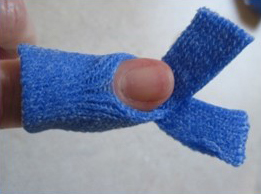
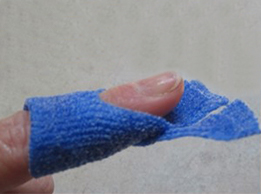
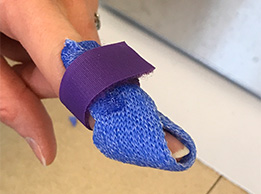
Place the middle portion under the fingertip. Bring the ends of the Orficast over and around the dorsal finger like a ribbon. Angle the two ends on top of each other towards the PIP joint.
Trim carefully on the sides so that a strap over the middle phalanx holds the orthosis in place.
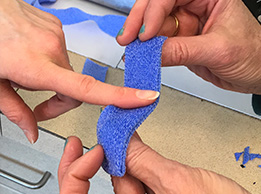
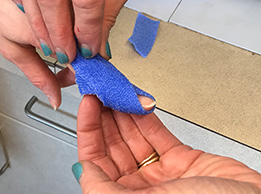
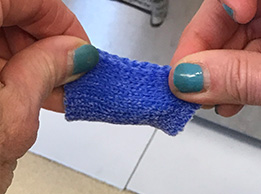
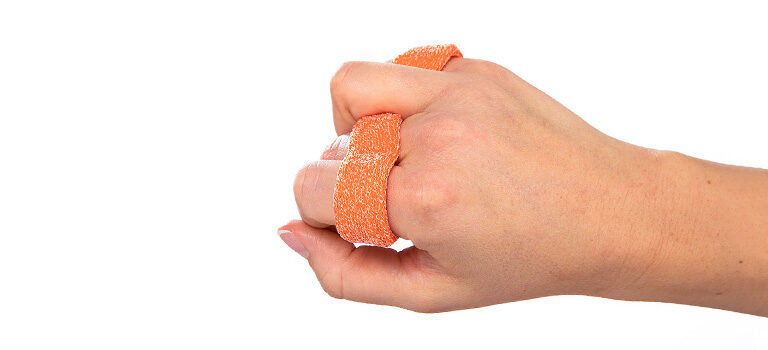
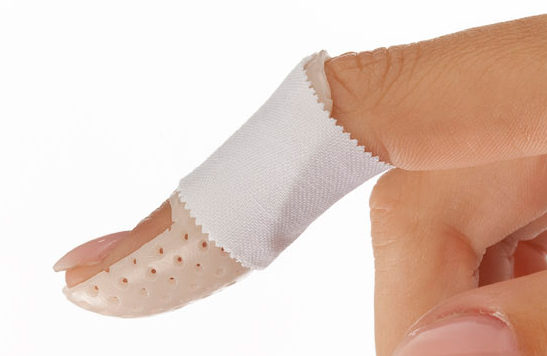
Cut a strip of Orficast 6 cm (2.5″) about 15 cm (6″) long and activate. Dry slightly to remove the excess water and fold the material in half, pressing both layers together firmly. Stretch the activated material around the middle and distal phalanges and pinch the sides together dorsally.
Then make sure to position the DIP in the desired amount of extension. Trim away the dorsal seam and the volar portion under the middle phalanx. Attach a strap.
Try the orthosis described above using one layer of Orficast More 6 cm (2.5”):
Tip: Use the heat gun to adhere adhesive backed hook to the orthosis. Heat both the glue and the orthosis for better bonding, and secure with additional small strips of Orficast that have been heated with the heat gun. See our tips and tricks for working with Orficast.
Questions?
If you have a question or comment, please post it in the Orfit Splinting & Rehabilitation Group on Facebook, or send an email to welcome@orfit.com


Written by Debby Schwartz, OTD, OTR/L, CHT
Physical Rehabilitation Product and Educational Specialist at Orfit Industries America.
Debby is a certified hand therapist with over 36 years of clinical experience. She completed her Doctorate of Occupational Therapy at Rocky Mountain University of Health Professions in 2010. She has worked at Orfit Industries America as Product and Educational Specialist since 2007.
Debby is also an adjunct professor at the Occupational Therapy Department of Touro University, School of Health Sciences, and at the Occupational Therapy Department at Yeshiva University, Katz School of Science and Health in NYC. She has written many book chapters in the field of hand therapy and multiple articles for hand therapy journals, including the ASHT Times and the Journal of Hand Therapy. She has published a new textbook on orthotic fabrication together with Dr. Katherine Schofield, entitled “Orthotic Design and Fabrication for the Upper Extremity: A Practical Guide”.
Debby’s Google Scholar
If you’d like to receive the latest product updates and interesting Orfit news, subscribe to our newsletter: